Kohei Fujii Guitars

Kohei Fujii Guitars

Sunday, October 24, 2021

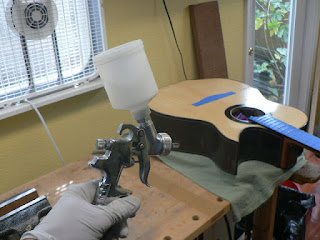
Final coat applying

      All Epoxy filling work and sanding work have been done. I am applying final coat. I finished five final coats at this moment. I have been using EM6000 water based acrylic finish from Target coating. After five coats apply, I examined missing spots for the filling work. I found some spots, and I filled with EM6000 + Silica thickener mixture. I will have a light sanding session for flattening the filled spots. Then, I will apply additional EM6000 five coats. Today is 10/25 Sunday, and it is raining. This is the first major storm here in California. So, I do not have spaying sessions today. I will resume the spraying work in this week after the sun comes back.  

     I also applied Epoxy filler on the bridge. This is a second session for the bridge. I will apply five EM6000 coats over the bridge. 


Sunday, October 17, 2021

Neck shaping and final sanding

 Neck shaping and final sanding work have been done. The neck has 21mm thickness at 1st fret and 23mm at 10th fret. This is my standard neck thickness. This time, I made a Gibson style volute that has a gentle curve at the nut section. Gibson neck has famous neck head braking issue from an unwanted impact. This is due to the Mahogany grain selection at the neck head. My neck has a V-joint in between the neck and the neck head. My neck head has a flat sawn cut that makes the best impact resistance. Therefore, my guitar neck has some of the best impact resistance. After complete the neck shaping, I did sanding work, and then I applied two Epoxy filler sessions. Now, this guitar is ready for the spraying sessions.


Bridge making

 Brazilian RW bridge is completed. Bridge making starts with material thickness sanding, and then I did the slotting work on the Brazilian RW blanks. Then, outline cut and detailed shaping have been done. In the picture, brown one is the Madagascar RW and chocolate color one is the Brazilian RW. After complete the shaping work, I filled with Epoxy and silica thickener. 


Sunday, October 3, 2021

Finger board install

After joint the neck to the body, I installed two dowels to increase the neck joint strength. Then, I cut three extra channels to extend the graphite rod channels. One of extra channels is also required for the truss rod install. After the graphite rod and the truss rod were installed, I cut the head plate veneer for the 5mm nut channel. Then, I made the 20" radius for the finger board. Finally, I completed the finger board installation. Both graphite rods and finger board were glued using Epoxy glue. Tight bond should be avoided for those jobs, because the moisture for the glue changes the neck length that alters the neck angle. I am working on the bridge making. I will make a Brazilian RW bridge to match the back and sides.