Kohei Fujii Guitars

Kohei Fujii Guitars

Wednesday, February 2, 2022

Neck making Part-2

After complete truss rod channels cut, neck volute was cut. Then, I adjusted the neck head thickness to 10.5mm. This makes total 14.5mm neck head thickness with head plate veneers. The neck head plate veneers were installed. Front side is the Madagascar rose wood, and back side is the African padauk. In the front side, black and white veneers were also laminated in between the Mad RW and the neck head.  I also completed the neck head outline cut. Now, the rough neck making is done. I will back to the body for binding installation.


Sunday, January 23, 2022

Neck Making

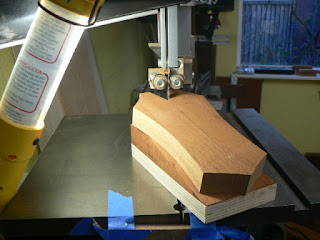
 I move to the neck making. Neck material is an 1" thickness Honduras Mahogany. Neck has the three piece configuration. Fingerboard material is the Indian ebony. Indian ebony is herder than the African Ebony. This guitar has the 650mm fingerboard slotting. This guitar needs fingerboard binding. Binding material is the Madagascar rosewood. This neck has the V-joint between the beck and the head. I have a V-joint cut fixture to realize 15-degree neck head angle. Rough cutting for the V-joint has been done by the Band saw. After the rough cutting, detailed fitting work has been done for both neck head and the neck. Neck head and blanks were glue jointed using the tight bond.


Tuesday, January 18, 2022

Closing Box

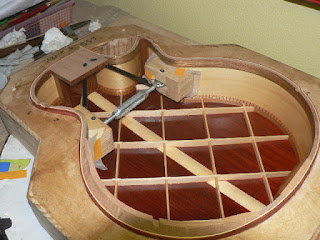
      SSJ body is closed. Before closing the body, I applied three coats of shellac in side the body. Shellac coat improves the moisture resistance against environment change. For the top, I did final scalloping for the top bracing. Then, I applied three coats of shellac inside the top. After closing the top, I trimmed out over laps on the top and the back. I also shaped the beveled armrest portion. Now, the body is ready for the binding work.

      I did tapping test for the body. This body showed a slightly tight tap tone. Generally speaking, SSJ body shows tighter tap tone than MD body. This is due to the tight waste shape. I will take a little bit aggressive thinning on the top when it complete the binding installation. This process will be the final tuning for obtaining the desired tone. Before the binding work, I will make neck blanks and fingerboard.


Sunday, January 9, 2022

Side laminate, block making, side assembly, and more ......

 SSJ making project has many progresses. Side laminate, block making, side assembly, solid lining making and install, and carbon rod install. The guitar body is almost ready for closing. All working steps have been done as I expected. At this moment, there is no issue, and everything is under control. I will close the box next week. 


Sunday, December 19, 2021

Back Bracing

     Back bracing work is done. Back bracing material is Sitka Spruce. Sitka has very good straight grain. Also, Sitka is the strongest spruce materials. I have been using the Sitka spruce for the back bracing. My back has 5x5 lattice bracing. Lattice bracing is very easy to install by using the vacuum bagging technique. Also, the lattice back bracing makes really beautiful 12' radius domed back. My back has relatively strong doming of 12' radius. So, the lattice bracing is the best for supporting back strongly without weigh increase penalty. 

     Next step is the slide making. I will laminate sides between African Padauk and the Alaskan yellow cedar. 


Sunday, December 12, 2021

Bracing work 2

 Sound board bracing work is still on going. Now, installing all bracing bars is completed. Traditional way of making top is using a Go-bar technique for non shaped bracing wood gluing. Them, all bracings are shaped. However, I always shape bracings before installing. This technique enables to shape bracing bars very aggressive way. Unlike the go-bar technique, the vacuum clamping method enables to install shaped bracing bars. I usually leave the top couple of weeks after complete the bracing installation. Then, I will take scalloping for all bracing bars. 

Next step is making the back using the lattice bracing. 


Sunday, December 5, 2021

Bracing work

 I start working on the bracing work for the top. Bracing work starts with the bridge plate install. I selected the Padauk for the bridge plate material. Then, I re-saw the bracing material from Adirondack logs. For the X-bracing material, I selected carefully to obtain the best straight grained piece. I usually shape the bracing material before install to the top. Then, I install X-bracing using a vacuum bag technique. I apply glue for both the bracing wood and the top for the void free gluing. This technique requires extra work for the excess glue cleaning. However, I am able to get the best glue joints.