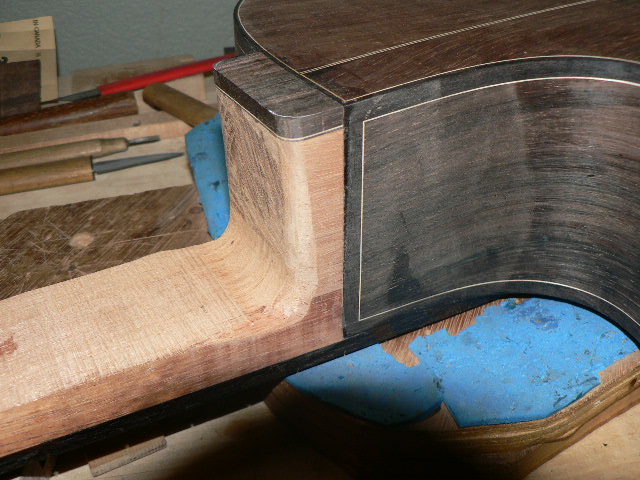
Brazilian Nylon model completed fret wire install and neck shaping. Before install fret wires, the finger board needs a final shaping to make the neck angle adjustment. Them, the finger board needed final sanding from 150, 220, 400, 600, and 1000 grit. Then, I installed fret wires. After finishing the fret wire install, I did the neck shaping. This time, I made a low profile neck shape that has 21.5mm at 0-fret and 22.5mm at 10th fret. I also made more aggressive shaping in neck edges to make easy playing. Although this neck has a pretty thin profile, this neck is very strong and stable against string tension. This neck already installed two graphite re-enforcement rods from the head to finger board end. Next week, I will take a final sanding and armrest making.
Kohei Fujii Guitars
Monday, February 15, 2016
Sunday, February 7, 2016
Fingerboard and heal cap installed
I installed finger board and heal cap. Finger-board was installed using an Epoxy glue to prevent the fingerboard expansion. Water based glue makes a fingerboard expansion issue which cleats neck reverse bending issue. Epoxy glue does not creates the fingerboard expansion issue. I also installed a heal cap. Heal cap was made by Brazilian RW which matches the back material. I also shaped a volute for the head. Next week, I will shape the neck. Then, I will install the fret wire. Then, this guitar just needs a final sanding.
Sunday, January 31, 2016
Graphite Truss rod install
I joint the neck. Neck joint needs a precise adjustments for neck angles for the string action and the finger board center line. Finger board center line needs 1mm offset at 12-frets. 1st strings to the finger board edge needs 1mm more room than the bass side. This asymmetrical strings set-up prevents the 1st string falling issue. To make this offset, neck should be jointed a little bit tilted manner. After joint the neck, I made two graphite truss-rod channels at the body top. Then, I installed two graphite truss rods.Graphite truss rods prevent a future neck bowing issue. Also, the truss rods makes neck recovery time first. Neck recovery time is the neck De-formation time constant when it hit one of strings. When you hit a string, your neck bends, and then recovers when string vibration stops, if you see a microscopic manner. So, the first neck recovery time constant makes more responsible sound. Now, some guitar makers start using a Titanium alloy for the truss rod. It might have better results using the Titanium truss rod, because Titanium has very small memory effects from bending.
Sunday, January 24, 2016
Finger board making and neck joint
Finger board making and mortise cut are done. Finger board material is African Black wood. This guitar has 25.4" scale with 24 frets. I have been using the mortise neck joint technique. For me, this method is able to make almost perfect fitting compared with Dob tail joint. At this moment, the neck joint is a temporary stage. I need fin adjustments for neck fitting to the body. Next week, I will complete the neck assembly and fingerboard gluing.
Sunday, January 17, 2016
Binding install cpmpleted
Finally, all binding works are completed. Body is ready for the sanding work. Bindings were installed with crispy Maple border between the body and bindings. Purfling for the back is a simple Black-white pattern that is matched with the white-black-white center inlay.
Next step is the neck and body mortise cut for the neck joint. Then, I will work with neck and fingerboard making.
Sunday, January 10, 2016
Purfling install
I completed the Purfling install. I also completed binding install on the sound board side. For the purfling install, purfling channels need very detailed hand fitting to make a crispy boarder. Electrical tool is not able to make this much preciseness. So, I have been using the hand cut technique. After, created precise purfing channel, purfling was installed, then binding material was also installed. Binding material is the African BW. African BW is my first choice for the binding. This material has pretty good black color. Also, this material has pretty good working friendliness for precise heat bending. For the binding install, I have been using a rope based clamping technique. This last photo is showing the completed body on the top side. Next week, I might be able to complete the binding install for entire body.
Sunday, January 3, 2016
Closing Box and Neck making
The box for the guitar body was closed. Inside of the body was completely sealed with couple of coats of Shellac. I also made a lot of progress for the neck making. This time, I selected Catalox for the slotted neck head. Catalox is a super hard material. However, it makes super smooth finish. I really like very dark purple color. This neck, I will install a matched Brazilian RW head plate veneer to the side and back.
Now, I am working on the detailed work for the body. I already completed the binding channel cut. I also completed the purfling channel cut. Before cut the purfling channel, I applied a cote of Shellac for protecting a fiber peeling issue from the taping for the binding installation. Top material is quite vulnerable from peeling off fibers using tapes. Next couple of weeks, I will install purfling and binding materials. Those are very time consuming detailed work.
Subscribe to:
Posts (Atom)