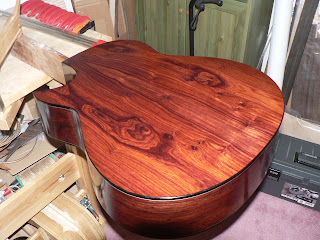
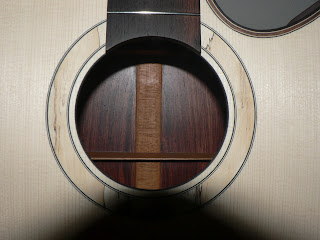
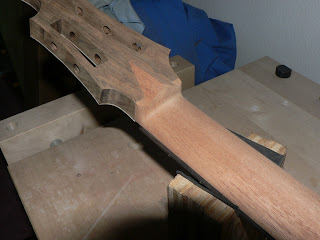
I finished final coat spraying. We have a heat wave this weekend, and the highest temperature is around 90 degree-F. I started spraying session early morning to avoid high temperature issue. I was able to spray quite nicely. I have been using a water based acrylic lacquer from Target coatings. I had very good results from previous Target products. This time, they discontinued the previous version, and upgraded a new version. This time, I used Emtech 7000. I sprayed with my HVLP spray with a 1.4mm spray tip, and 40-psi air pressure. This setting makes best spraying control for me. I also made an armrest for the nylon model. The armrest is made from a Maple. I black died the armrest.
I will take approximately 7-9 days to get complete cure for final sanding and polishing sessions. White waiting the curing, I make bridges and bone nut and saddle.
Kohei Fujii Guitars

Sunday, September 30, 2012
Sunday, September 23, 2012
Filler leveling
There is not much progress visually; however, I did a lot of work this week. I did leveling sessions for Epoxy filler to get the final spray session ready surface. I needed two filler applying sessions for Spanish ceder necks. King-wood body and Myrtle body were able to obtain nice leveling with only one session. After finishing the leveling session, I applied an Alcohol thinned Epoxy coat to optimize color difference due to an excess sanding during the surfacing session. It takes approximately 48-nours to obtain complete Epoxy cure for the Epoxy coat, because the Alcohol work as a retarder. Now, both MD and Nylon model are ready for final coats spraying. I will spray 10-filanl coats in two days next weekend.
There is a question from the MD client. His question is that this body seems a bit thicker than ordinal D-size guitar. This MD body does not have thickness modification. Thickness at the bottom is 120mm ,and at the neck joint, it is 94mm.
There is a question from the MD client. His question is that this body seems a bit thicker than ordinal D-size guitar. This MD body does not have thickness modification. Thickness at the bottom is 120mm ,and at the neck joint, it is 94mm.
Sunday, September 16, 2012
Epoxy filler apply
I finished Epoxy filler apply for both MD and Nylon models.I have been using System-3 with Silica powder for pore filling. This technique is able to finish the pore filling process in one session if I very carefully fill pores. This is a real time saver. Also, System-3 based filler does not sink much over the time compared with conventional filler. Only one draw back for the Epoxy filler is a poor adhesion over the Shellac. So, I have to avid using Shellac as a sealer.
After applying the Epoxy filler, a really beautiful color and figures are appeared as you can see those photos. King wood has really nice reddish color. Myrtle wood has extremely nice figures and spider patterns. Both models will be very nice eye catching guitars.
After applying the Epoxy filler, a really beautiful color and figures are appeared as you can see those photos. King wood has really nice reddish color. Myrtle wood has extremely nice figures and spider patterns. Both models will be very nice eye catching guitars.
Sunday, September 9, 2012
MD final sanding is done
Final sanding for the MD is done. MD is ready for the finishing work, Capatian top looks pretty nice, and King wood back and sides are also pretty good. King wood is a tricky material for the finishing work, because this material has quite strong reddish stain that easily contaminate brighter color materials such as top and Black-white border. I have been using Epoxy filler, and the Epoxy filler is able to prevent the contamination issue. However, when I apply Epoxy filler, I need an extreme care. It seems like the King wood has fairly small pores, and one Epoxy filling session might be able to fill the pores completely. I will have a final sanding session for the Nylon model next week, and then I will start finishing work for both models.
Monday, September 3, 2012
Neck making 8
I changed heal shape design for the MD model. First photo is for last week's shape, and second one is for this week's one. I made a little bit of negative curve for the heal portion. This is a bit beautiful for me. I also installed a semi raised neck shim above 14th fret. Now, the MD making is completed, and the last step is a sanding work, and then I will start finishing process.
For the Nylon model, I finished the neck shaping work. This neck has a V-joint between the neck and the head. I made a Diamond volute at the v-joint. Martin D-28 has the diamond volute; however, D-28's volute is a faked one. Only v-joint neck is able to make the diamond volute. I did a drilling work for the slotted head. This unique neck head design requires an individual machine head drilling. I created an individual drilling jig for this unique neck making. Now, the nylon model is also ready for the final sanding session.
For the Nylon model, I finished the neck shaping work. This neck has a V-joint between the neck and the head. I made a Diamond volute at the v-joint. Martin D-28 has the diamond volute; however, D-28's volute is a faked one. Only v-joint neck is able to make the diamond volute. I did a drilling work for the slotted head. This unique neck head design requires an individual machine head drilling. I created an individual drilling jig for this unique neck making. Now, the nylon model is also ready for the final sanding session.
Subscribe to:
Comments (Atom)


