Kohei Fujii Guitars

Kohei Fujii Guitars

Sunday, August 29, 2021

Binding Install

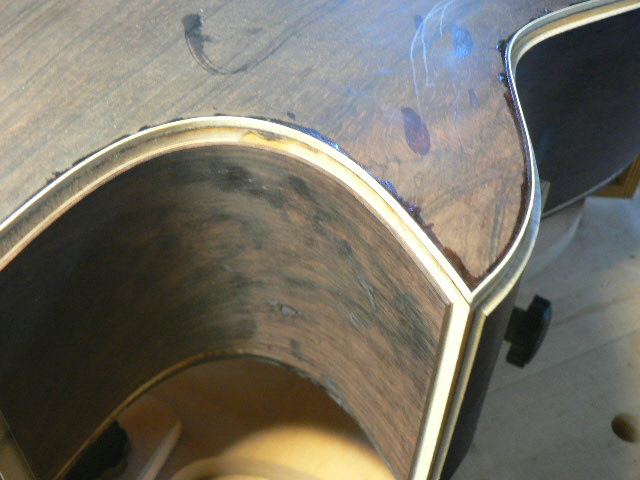
 I have been working on the binding installation work. Major portions are done. This guitar still need to be installed the beveled armrest portion and the cut-a-way portion. Brazilian RW binding material made this guitar really gorgeous. Next week, I will complete the binding installation work for the body. Then, the body is pretty much complete.


Sunday, August 22, 2021

Purfling install

 I have been working on the purfling installation. I completed binding channel and purfling channel cut. Those are very detailed work. After using a laminate trimmer, I clean-up the those channels using chisels, small knifes, and tiny sanding blocks. After made those channels clean enough, purfling materials were installed. Top side is the Black-white-black purfling. Side and back are black-white purfling. Next week, I will install Brazilian rose wood binding materials.


Monday, August 16, 2021

Detailed work for body and neck

    Last week-end I did not upload the neck work. So, this post will show many progresses. Now, I moved to detailed work for the neck and the body. I did neck head outline cut and peg hole drilling. Waverly high geared ratio (23:1) tuner will be installed. This is a new model from the Waverly brand. The gear ratio has been 18:1. Finally, Waverly introduced 23:1 version, and it makes much easier tuning work. Fret slots were cut for the 650mm scale on a west African Ebony material. Sound hole section has not been profiled at this moment, and I did a rough cut for the detailed final shaping.  


Binding material were cut from a Brazilian RW material that is a left over from side materials. Then, binding and purfling materials were bent fitting for the body curves. Beveled armrest portion was profiled. Purfling and binding channels were cut. Now, the body is ready for the purfling and binding install. I already completed the back-side purfling installation.


Sunday, August 1, 2021

Neck blanks making

 This week, I did the neck blanks making. I did rough cut for the neck using the band-saw. Then, I made V-joint between neck head and the neck. Then, I did an other band-saw cut for the neck head portion to make total 14.5mm final head thickness. At this moment, the neck head should be 11mm thickness. I also sanded neck head veneers. This time, front and back veneers are Brazilian RW. Those Brazilian RW veneers are left-over from the side material re-sawing.


Sunday, July 25, 2021

Closing Box

     A box for the Brazilian MD model was closed. I applied two coats of Shellac inside the box. This is a moisture protection purpose. Tap tone from the closed box showed very good potential of the sound quality as usual. Tap tone showed very long sustain that is approximately 1-second. 

    Next step is the neck blanks making. After complete the neck blanks, I will be back to the detailed work for the body making. 


Tuesday, July 20, 2021

Lining and Carbon rod install

     Lining and carbon rod installation work were done. I have been using solid lining for the top side, and slotted conventional lining for the bottom side. Solid lining is required for the top side, because the solid lining has better rigidness to support the sound board. This improves the sound crispiness. 

     I also installed two carbon fiber rods from in between the neck block and the bottom side of the body waist. Those carbon rods are for body deformation prevention for avoiding future neck re-setting work. Also those carbon rods improves sound quality, because the neck join to the body has better rigidness due to the carbon rod support. 

    There is no black magic to make good tonal quality for an acoustic guitar. I put together many small differentiations into one guitar package. That is why custom guitars are better than factory made guitars.


Thursday, July 15, 2021

Block install complete

      Neck block, tail block, cut-a-way block, and armrest block are installed. All blocks are made from Honduras mahogany except the armrest. Grain direction is important. I glued four Mahogany pieces to make just like a neck heal section. This grain direction makes the best stability for supporting the side at the neck joint. However, this cut is a bit difficult to shape the neck block for fitting the side, because I have to cut cross grain. If I use a well shaped plane blade, the block shaping work is very enjoyable. 

     Cut-a-way section installation is a tricky game. I am using my custom made fixture and shock codes. This technique works very well. 

    Armrest is made from five piece of Spanish cedar those are leftover from the neck making. Armrest block installation is also very tricky, because of the shape. I made custom cauls those were fitted for the armrest shape. Using those custom cauls, the armrest is able to glue without glue voids.

    Next step is carbon-fiber rods installation in between neck block and the side for the neck support stability improvement.